CHOU
[MSRDS] Brick Service 알아보기 본문
이전에 배운 서비스 개발 방법을 이용하여 실제 로봇 제조회사에서 로봇관련 서비스를 개발하는 방법처럼 이전의 범퍼 서비스, 모터 서비스, 드라이브 서비스를 한번에 구현하는 방법을 알아보겠습니다. 아마도 오늘 까지 서비스 개발방법 기본 공부가 끝나고 시뮬레이션 부분 공부를 마치면 제가 만든 로봇에 지금까지 배운 내용을 적용 할텐데, 그때 정말 도움이 되는 내용일 것 같습니다. 오늘도 역시 네이버 MSRDS 공식카페( http://cafe.naver.com/msrskoea )에 김영준 수석님께서 올려주신 예제를 가지고 배워 보겠습니다.
로봇들은 시리얼 통신이나 dll 호출 등 뭔가 하나의 프로그램에서 실제 하드웨어와 인터페이스를 수행하게 됩니다. 이 하나의 프로그램은 실제 로봇 하드웨어와 MSRS 의 다양한 서비스들 간의 중재 역할을 수행하게 되는데 MSRS 에서는 이런 서비스를 Brick 서비스라고 부릅니다. 그리고 센서나 모터, 드라이브와 같은 단일 서비스 들을 Generic 서비스라고 부릅니다.
Brick 서비스는 실제로 Microsoft.RoboticsCommon.proxy.dll 에 있는 기능을 사용하지는 않지만, 범퍼, 모터, 드라이브 등의 서비스와 모두 커뮤니케이션을 해야하기 때문에 Microsoft.RoboticsCommon.proxy.dll 파일이 필요 합니다.
일반적으로 브릭 서비스를 구현할 때에는 아래와 같이 기본의 Generic 서비스들과 아래의 형태로 연결을 구성합니다.

그림1. 실제 로봇 서비스 다이어 그램(출처 : 네이버 카페 --> 김영준 수석님 작성)
하지만 오늘은 하드웨어에 직접 연결하지 않고, 간단히 로그만 남기는 형태를 알아보고 응용을 하면 될거 같습니다^^..

그림2. 서비스 다이어그램 (출처 : 네이버 카페 김영준 수석 님 작성)
위의 다이어그램을 바탕으로 코드를 생성해 보고 실행해 보겠습니다.
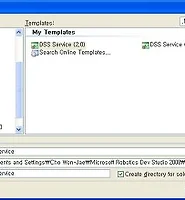
1. 자신의 MSRDS 설치 폴더 아래 Sample 폴더에 DSS 프로젝트를 생성합니다.

그냥 오케이 하시면 됩니다.

2. 레퍼런스에 RoboticsCommon.proxy.dll 파일을 추가해 줍니다.

설치 폴더 아래 bin 폴더에 보면 있습니다.

3. 프로젝트명types.cs 를 아래 코드와 같이 수정해 줍니다.
using System;
using System.Collections.Generic;
using System.ComponentModel;
using Microsoft.Ccr.Core;
using Microsoft.Dss.Core.Attributes;
using Microsoft.Dss.ServiceModel.Dssp;
using Microsoft.Dss.ServiceModel.DsspServiceBase;
using W3C.Soap;
//add code
using drive = Microsoft.Robotics.Services.Drive.Proxy;
using bumper = Microsoft.Robotics.Services.ContactSensor.Proxy;
using motor = Microsoft.Robotics.Services.Motor.Proxy;
namespace testBrickService
{
public sealed class Contract
{
public const string Identifier = "http://schemas.tempuri.org/2009/04/testbrickservice.html";
}
[DataContract]
public class testBrickServiceState
{
}
[ServicePort]
//UpdateDrive, updateMotor
public class testBrickServiceOperations : PortSet<DsspDefaultLookup, DsspDefaultDrop,
UpdateDrive, UpdateMotor>
{
}
//add code
//drive 값을 받아 들이기 위한 인터페이스
public class UpdateDrive : Update<drive.SetDrivePowerRequest,
PortSet<DefaultUpdateResponseType, Fault>>
{
public UpdateDrive()
{
}
public UpdateDrive(drive.SetDrivePowerRequest body)
: base(body)
{
}
}
//Motor 값을 받아 들이기 위한 인터페이스
public class UpdateMotor : Update<motor.SetMotorPowerRequest,
PortSet<DefaultUpdateResponseType, Fault>>
{
public UpdateMotor()
{
}
public UpdateMotor(motor.SetMotorPowerRequest body)
: base(body)
{
}
}
}
4. 프로젝트명.cs 를 아래 코드와 같이 추가, 수정해 줍니다.
using System;
using System.Collections.Generic;
using System.ComponentModel;
//add code
using System.Xml;
using Microsoft.Ccr.Core;
//add code
using Microsoft.Dss.Core;
using Microsoft.Dss.Core.Attributes;
using Microsoft.Dss.ServiceModel.Dssp;
using Microsoft.Dss.ServiceModel.DsspServiceBase;
using W3C.Soap;
using submgr = Microsoft.Dss.Services.SubscriptionManager;
//add code
using drive = Microsoft.Robotics.Services.Drive.Proxy;
using bumper = Microsoft.Robotics.Services.ContactSensor.Proxy;
using motor = Microsoft.Robotics.Services.Motor.Proxy;
namespace testBrickService
{
[Contract(Contract.Identifier)]
[DisplayName("testBrickService")]
[Description("testBrickService service (no description provided)")]
class testBrickService : DsspServiceBase
{
private testBrickServiceState _state = new testBrickServiceState();
[ServicePort("/testBrickService", AllowMultipleInstances = false)]
private testBrickServiceOperations _mainPort = new testBrickServiceOperations();
//Bumper
//서비스에 데이터를 전달하기 위해서는 대상 서비스를 사전에 파트너로 지정해서
//오픈 시켜야 합니다.
[Partner("testBumperService", Contract = testBumperService.Contract.Identifier,
CreationPolicy = PartnerCreationPolicy.UseExistingOrCreate)]
private bumper.ContactSensorArrayOperations _brickBumperPort = new
bumper.ContactSensorArrayOperations();
//Bumper 데이터를 자동으로 생성하기 위해 타이머 포트를 정의합니다.(임시)
private Port<DateTime> _timePort = new Port<DateTime>();
//[SubscriptionManagerPartner]
//submgr.SubscriptionManagerPort _submgrPort = new submgr.SubscriptionManagerPort();
public testBrickService(DsspServiceCreationPort creationPort)
: base(creationPort)
{
}
protected override void Start()
{
base.Start();
//범퍼 데이터를 3초 간격으로 자동으로 생성해 주기위한 코드
_timePort.Post(DateTime.Now);
Activate(Arbiter.Receive(true, _timePort, TimerHandler));
}
//create Bumper data
void TimerHandler(DateTime signal)
{
//create vitual Bumper signal
bumper.ContactSensor _newSensor = new bumper.ContactSensor();
_newSensor.HardwareIdentifier = 1;
_newSensor.Name = "Front";
_newSensor.Pressed = true;
_brickBumperPort.Post(new bumper.Update(_newSensor));
//타이머를 다시 호출함
Activate(
Arbiter.Receive(
false, TimeoutPort(3000),
delegate(DateTime time)
{
_timePort.Post(time);
}
)
);
}
[ServiceHandler(ServiceHandlerBehavior.Exclusive)]
public virtual IEnumerator<ITask> UpdateHandler(UpdateDrive update)
{
LogInfo(LogGroups.Console, "[[Brick Drive Service]]" +
update.Body.LeftWheelPower.ToString() + " " + update.Body.RightWheelPower.ToString());
update.ResponsePort.Post(DefaultUpdateResponseType.Instance);
yield break;
}
[ServiceHandler(ServiceHandlerBehavior.Exclusive)]
public virtual IEnumerator<ITask> UpdateHandler(UpdateMotor update)
{
LogInfo(LogGroups.Console, "[[Brick Motor Service]]" +
update.Body.TargetPower.ToString());
update.ResponsePort.Post(DefaultUpdateResponseType.Instance);
yield break;
}
}
}
//drive Service Part
namespace TestDriveService
{
public sealed class Contract
{
public const string Identifier = "http://schemas.tempuri.org/2009/04/testbrickservice.html";
}
[Contract(Contract.Identifier)]
[DisplayName("TestDriveService")]
[Description("TestDriveService service (no description provided)")]
//add code
[AlternateContract(drive.Contract.Identifier)]
class TestDriveService : DsspServiceBase
{
//AllowMultipleInstances = true -> false
[ServicePort("/TestDriveService", AllowMultipleInstances = false)]
//add code
private drive.DriveOperations _mainPort = new drive.DriveOperations();
//add code
//brick 서비스에 데이터를 전달하기 위해 브릭 서비스의 mainPort를 사용
//브릭 서비스에 데이터를 전달하기 위해서는 단순히 아래 포트에 데이터를 post하면
//됩니다.
[Partner("testBrickService", Contract = testBrickService.Contract.Identifier,
CreationPolicy = PartnerCreationPolicy.UseExistingOrCreate)]
private testBrickService.testBrickServiceOperations _brickPort = new
testBrickService.testBrickServiceOperations();
public TestDriveService(DsspServiceCreationPort creationPort)
: base(creationPort)
{
}
protected override void Start()
{
base.Start();
}
//add code
[ServiceHandler(ServiceHandlerBehavior.Exclusive)]
public virtual IEnumerator<ITask> UpdateHandler(drive.SetDrivePower update)
{
LogInfo(LogGroups.Console, "[[-Drive Service-]]: " + update.Body.LeftWheelPower.ToString() +
" " + update.Body.RightWheelPower.ToString());
//add code
//drive 값을 수신하였으면 해당 값을 브릭 서비스로 전달함
_brickPort.Post(new testBrickService.UpdateDrive(update.Body));
update.ResponsePort.Post(DefaultUpdateResponseType.Instance);
yield break;
}
}
}
//Motor Service Part
namespace DSSMotorService
{
public sealed class Contract
{
public const string Identifier = "http://schemas.tempuri.org/2009/04/dssmotorservice.html";
}
[Contract(Contract.Identifier)]
[DisplayName("DSSMotorService")]
[Description("DSSMotorService service (no description provided)")]
//add code
[AlternateContract(motor.Contract.Identifier)]
class DSSMotorService : DsspServiceBase
{
//add code
private motor.SetMotorPower _state = new motor.SetMotorPower();
[ServicePort("/DSSMotorService", AllowMultipleInstances = false)]
//add code
private motor.MotorOperations _mainPort = new motor.MotorOperations();
//add code
//brick 서비스에 데이터를 전달하기 위해 브릭 서비스의 mainPort를 사용
//브릭 서비스에 데이터를 전달하기 위해서는 단순히 아래 포트에 데이터를 post하면
//됩니다.
[Partner("testBrickService", Contract = testBrickService.Contract.Identifier,
CreationPolicy = PartnerCreationPolicy.UseExistingOrCreate)]
private testBrickService.testBrickServiceOperations _brickPort = new
testBrickService.testBrickServiceOperations();
public DSSMotorService(DsspServiceCreationPort creationPort)
: base(creationPort)
{
}
protected override void Start()
{
base.Start();
}
//add code
[ServiceHandler(ServiceHandlerBehavior.Exclusive)]
public virtual IEnumerator<ITask> UpdateHandler(motor.SetMotorPower update)
{
LogInfo(LogGroups.Console, "[[[-Motor Service-]]] " + update.Body.TargetPower.ToString());
//add code
//motor 값을 수신하였으면, 해당 값을 브릭 서비스로 전달한다.
_brickPort.Post(new testBrickService.UpdateMotor(update.Body));
update.ResponsePort.Post(DefaultUpdateResponseType.Instance);
yield break;
}
}
}
//bumper service Part
namespace testBumperService
{
public sealed class Contract
{
public const string Identifier = "http://schemas.tempuri.org/2009/04/testbumperservice.html";
}
[Contract(Contract.Identifier)]
[DisplayName("testBumperService")]
[Description("testBumperService service (no description provided)")]
//add code
[AlternateContract(bumper.Contract.Identifier)]
class testBumperService : DsspServiceBase
{
//add code
private bumper.ContactSensor _state = new bumper.ContactSensor();
//AllowMultipleInstances = true -> false
[ServicePort("/testBumperService", AllowMultipleInstances = false)]
//add code
private bumper.ContactSensorArrayOperations _mainPort = new
bumper.ContactSensorArrayOperations();
//구독 기능을 위해 항상 추가되어야 하는 코드입니다.
[Partner("SubMgr", Contract = submgr.Contract.Identifier, CreationPolicy =
PartnerCreationPolicy.CreateAlways)]
private submgr.SubscriptionManagerPort _submgr = new
submgr.SubscriptionManagerPort();
public testBumperService(DsspServiceCreationPort creationPort)
: base(creationPort)
{
}
protected override void Start()
{
base.Start();
}
//add code
//update 핸들러를 위해 추가된 코드
//bumper.ContactSensor 는 update 핸들러를 통해 저장됨
//전달받은 센서의 상태 값을 state 변수에 저장됨
[ServiceHandler(ServiceHandlerBehavior.Exclusive)]
public virtual IEnumerator<ITask> UpdateHandler(bumper.Update update)
{
_state = update.Body;
//구독 관리자에게 값을 전달 함
SendNotification<bumper.Update>(_submgr, _state);
update.ResponsePort.Post(DefaultUpdateResponseType.Instance);
yield break;
}
//구독기능을 위해 기본적으로 항상 추가되어야 하는 모듈 입니다.
[ServiceHandler(ServiceHandlerBehavior.Concurrent)]
public virtual IEnumerator<ITask> SubscribeHandler(bumper.Subscribe subscribe)
{
SubscribeHelper(_submgr, subscribe.Body, subscribe.ResponsePort);
yield break;
}
}
}
좀 길어서 어려움을 느낄 수 있는데 자세히 보면 이전에 만든 범퍼 , 모터, 드라이브 서비스를 한데 묶어서 테스트 하기위해 가상의 타이머를 설정해 주고, 모터와 드라이브 서비스는 파트너로 등록해서 사용하게 한것 입니다. 이전에 만들어 놓은 서비스들을 namespace 로 묶어서 붙여주고, 약간만 수정해 주면 됩니다.
그다지 어려운 내용은 아니었는데, 예제 코드를 보면서 수정하는 부분이 주의를 할 필요가 있는 부분인거 같습니다.
참고자료
1. http://cafe.naver.com/msrskorea
MSRDS 네이버 공식 카페
2. 예제코드 파일
3. MSRDS2.0 MyFirstBrick

 testBrickService.zip
 myfirstbrick_msrds2008_install.exe

